Address Book
Getting Started · Company Profile & QuickBooks · Projects · Unions & Dispatch · Generating Forms · Sending & Delivery · Address Book · Filing History · Tips & FAQ
Address Book
The Address Book stores the contacts you send forms to over and over — agency offices, apprenticeship committees, project owners, subcontractors, and anyone else. Save a contact once, then drop it into a form, a destination, or a subcontractor with a single click instead of re-typing it. Access it anytime by clicking the Address Book icon (📒) in the dashboard tab bar.
Adding Addresses
Click + Add New Address and fill in the contact details:
- Label (required) — A short name for quick identification (e.g., “DAS Sacramento Office”)
- Contact Name — The person’s name
- Organization — Their company or agency
- Email, Phone, Fax — Contact information (phone and fax accept digits, dashes, parentheses, and spaces only)
- License Number — Contractor license number (if applicable)
- Street Address, City, State, ZIP — Physical mailing address (Google address autocomplete available)
- Type — Government Agency, Contractor, Apprenticeship Committee, Union, or Other
- Tags — Optional labels for organizing (e.g., “agency”, “committee”)
If you try to add an address with a label that already exists, you’ll be prompted to update the existing entry or save as a new one.
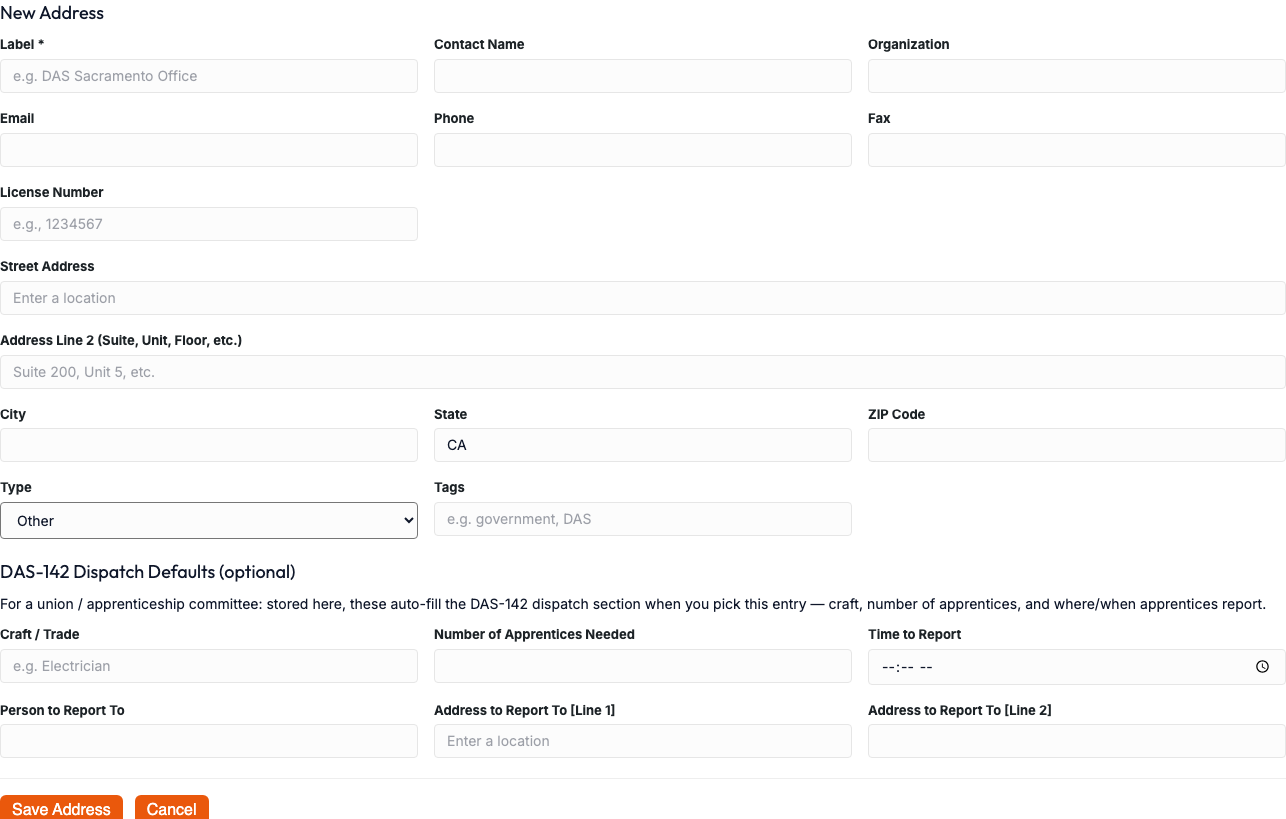
DAS-142 Dispatch Defaults
When an address is a union or apprenticeship committee, you can store its standing dispatch details right on the entry — the same details you’d otherwise re-type onto every DAS-142 you send it. The DAS-142 Dispatch Defaults section captures:
- Craft / Trade
- Number of Apprentices Needed
- Time to Report
- Person to Report To
- Address to Report To (Line 1 & Line 2 — with Google address lookup)
Enter these once, and the next time you pick this contact while filling out a DAS-142, they drop straight into the form’s dispatch section in one click — no re-typing each round.
The report date is intentionally not stored here. It changes every time you request apprentices, so you set it per dispatch rather than saving it on the contact. Everything else stays put.
These dispatch fields also appear in the address-picker pop-ups throughout AutoFiler, so you can fill them in (or edit them) right where you pick the contact, without leaving the form.
For the full apprenticeship-dispatch workflow — building the DAS-140 and DAS-142 from a per-project union roster and sending repeatable dispatch rounds — see Unions & Dispatch.
Favorites
Click the star icon (☆) next to any address to mark it as a favorite. Favorites appear at the top of the address book and at the top of address-picker modals when you’re filling forms, so your most-used contacts are always within reach.
Using Addresses in Forms
Saved addresses appear throughout AutoFiler wherever you see a Fill from Address Book button or an address-picker modal:
- On the project form, address-grouped fields (like Public Agency or committee contacts) have a picker button
- In Step 3 (Destinations), the address picker lets you add recipients for email or physical mail
- On the subcontractor form, you can fill subcontractor details from your address book
CSV Import
If you have a spreadsheet of addresses, click Import CSV to upload it. Download the sample CSV template from the import dialog to see the expected format. Duplicate addresses (matching label and organization) are automatically detected and skipped during import.
Bulk Actions
Use the checkboxes to select multiple addresses, then use the Bulk Delete button to remove them all at once.