Generating Forms
Getting Started · Company Profile & QuickBooks · Projects · Unions & Dispatch · Generating Forms · Sending & Delivery · Address Book · Filing History · Tips & FAQ
Generating Forms
To generate forms, click Choose Form on any project card (or click Generate Form from the project edit page). The form wizard walks you through a simple 4-step process — choose your forms, fill the fields, set destinations, then preview and send. Generating and previewing are always free; you only spend a credit when you download, email, or mail a finished form.
This page focuses on making the PDF — Steps 1 and 2, generating, and previewing. When you’re ready to actually email or mail your forms, see Sending & Delivery.
Dashboard Navigation
The AutoFiler dashboard uses a streamlined navigation bar. The Projects tab is always visible. When you enter the form wizard, a Generate Forms tab appears. Three icon links in the top-right provide quick access to the Address Book (📒), Filing History (📋), and Company Profile (🏢).
Step 1: Choose Form
Select one or more form types to generate. The forms shown depend on your project type:
Public Works Projects:
- Pre-lien Public Works — California Preliminary Notice for public works
- DAS-140 — Contract Award Information (submitted to DAS when a contract is awarded)
- DAS-142 — Request for Dispatch of Apprentices
- 119 Public Works Lien — Notice to parties on a public works project
Private Projects:
- Pre-lien Private — California Preliminary Notice for private works
- Conditional Progress — Conditional Waiver and Release on Progress Payment
- Unconditional Progress — Unconditional Waiver and Release on Progress Payment
- Conditional Final — Conditional Waiver and Release on Final Payment
- Unconditional Final — Unconditional Waiver and Release on Final Payment
You can select multiple forms to generate them all at once in a single pass. If you’ve generated forms for this project before, status badges on the cards show their current state.
Step 2: Fill Fields
This step uses a split-view layout. On the left, you’ll see all the form fields. On the right, a live PDF preview shows exactly where each field appears on the actual form.
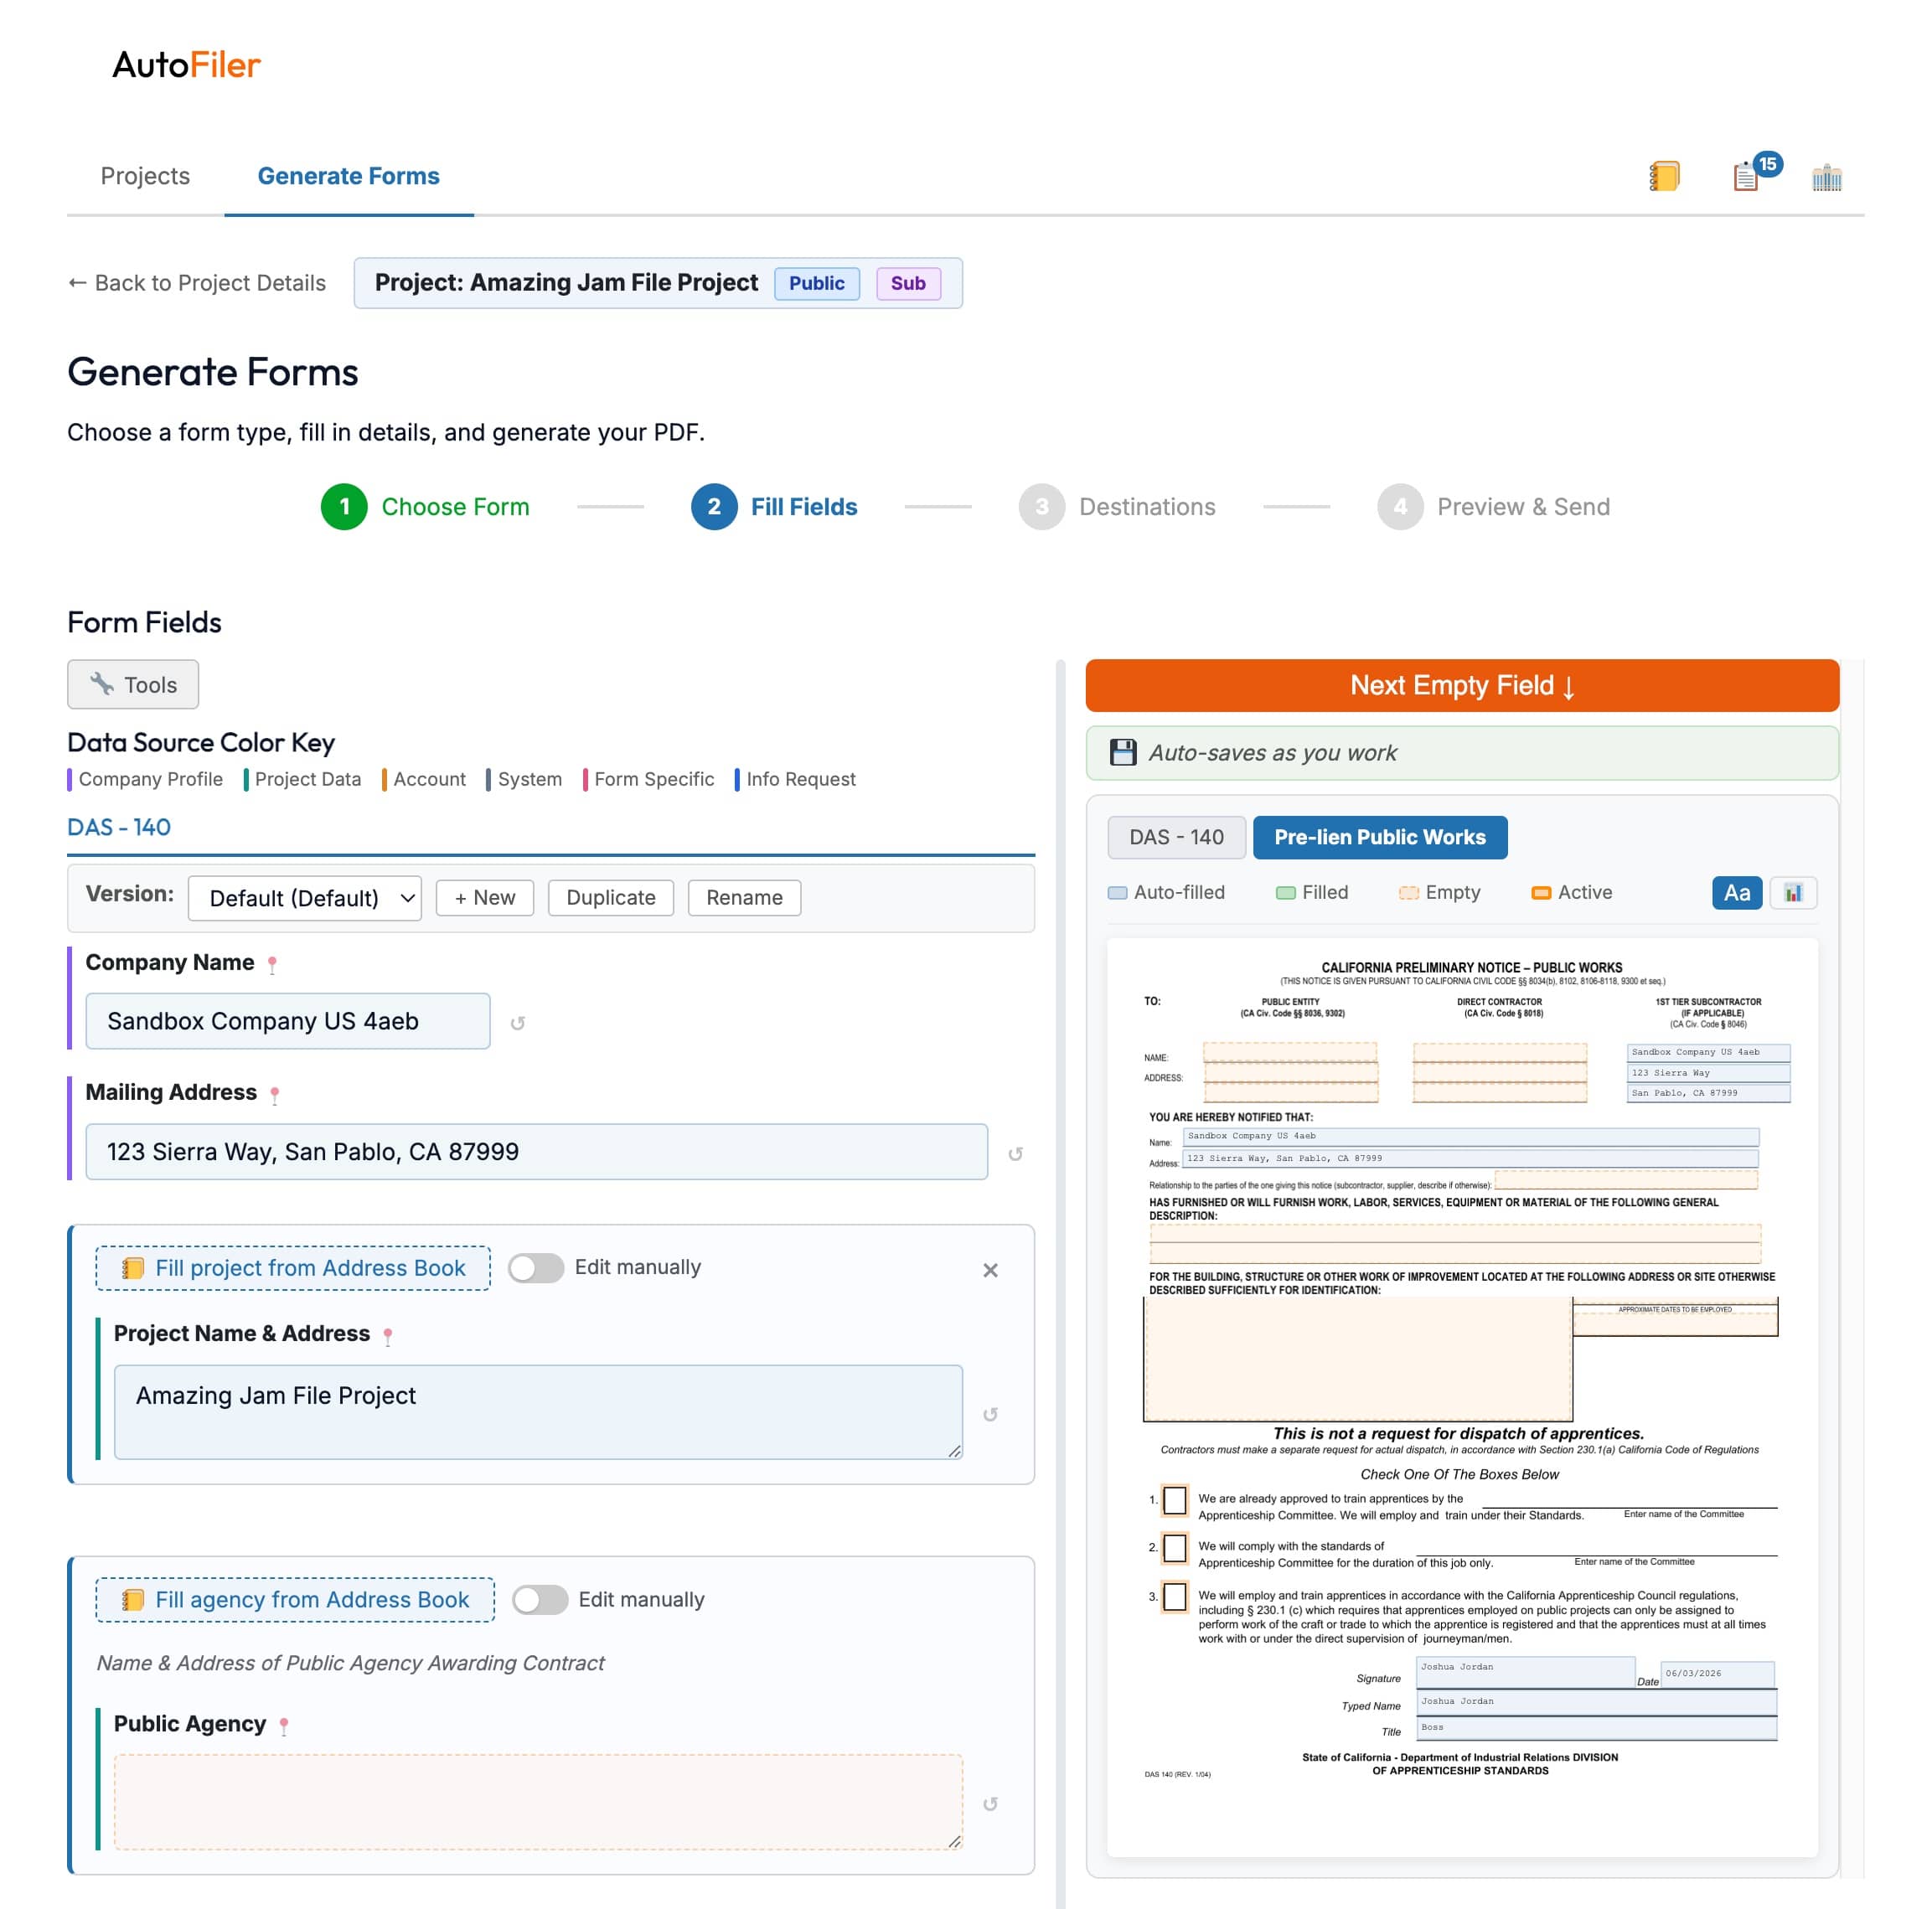
Field Color Coding
Field colors show where each value comes from:
- Blue border — Auto-filled from your Company Profile, Project, or Information Request data
- Green border — Filled by you (manually entered)
- Red/dashed border — Empty, still needs to be filled
- Orange border — The field you’re currently editing
Interactive Preview
- Click any highlighted rectangle on the preview to jump to that field in the form
- Hover over a field on the left to see its location highlighted on the preview
- Use the Next Empty Field ↓ button to quickly jump to the next unfilled field
- Toggle Field Values (Aa button) to show or hide text inside preview rectangles
- Click the Statistics icon to see completion progress across all selected forms
If you selected multiple forms, use the tabs above the preview to switch between form previews. All fields for all selected forms are shown on the left.
Form Versions
You can create multiple versions of each form — for example, a separate version for each apprenticeship committee on the same project. Use the version toolbar above the fields to create, duplicate, rename, or switch between versions.
This is the foundation of the union workflow: one DAS-140 and DAS-142 version per committee, sent and tracked independently. The union roster builds and manages these versions for you automatically — see Unions & Dispatch for the full flow.
Import From
If you’ve received Information Request responses, use the Import From dropdown in the version toolbar to select which response populates the form’s import buttons. Click an Import button on any field to pull in the value from that response — no manual re-typing.
Field Inspector
Right-click any field label to open the Field Inspector, which shows the field’s source, its location on the PDF, and a link to navigate directly to the source field on the Company Profile or Project page.
Your entries auto-save as you work, so you won’t lose progress if you navigate away or close your browser.
Step 3: Destinations (Optional)
Add email or physical mailing addresses where you’d like the generated forms to be sent. Each form type has its own collapsible section. You can:
- Pull Destinations from Form — Automatically extract addresses from the form’s address fields and add them as destinations
- Select from Address Book — Pick recipients from your saved contacts, or add a new contact directly from the picker
This step is optional — you can skip it and simply download the PDFs in the next step. For the full sending story — email, USPS mailing tiers, tracking, and no-login recipient replies — see Sending & Delivery.
Click Generate when you’re ready. If any fields are empty, you’ll see an Empty Fields Review listing which fields are blank. Click any field name to jump back to it on Step 2, or click Generate Anyway to proceed (empty fields are simply left blank on the PDF).
Step 4: Preview & Send
Your generated forms appear with status badges:
- Draft · 1 credit — The form is generated but not yet committed. Previewing is free.
- Paid ✓ — You’ve already used a credit on this form. Downloads, emails, and re-sends are free.
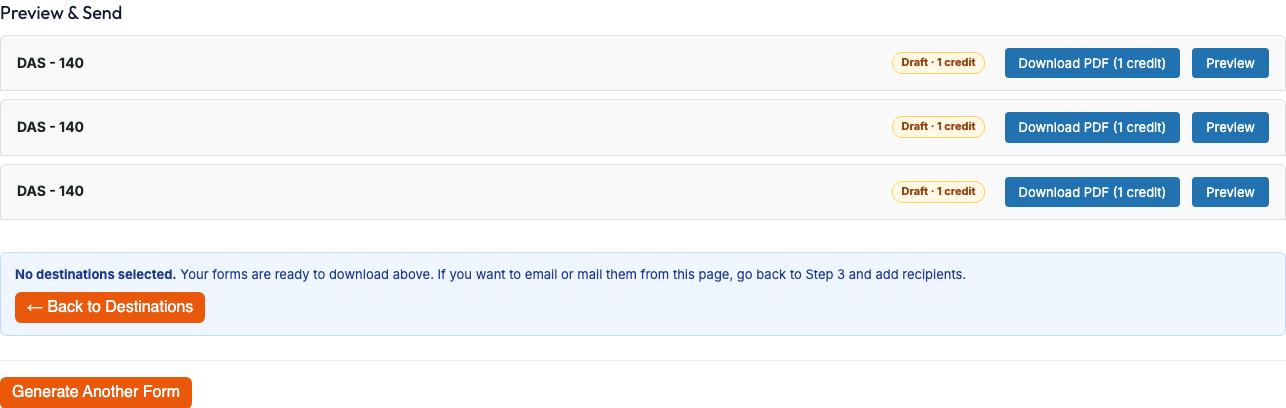
For each form, you can:
- Preview in Browser — View the filled PDF inline (free, no credit charged). Use it to check your work before committing.
- Download PDF — Save to your computer. The first download spends 1 credit; re-downloading the same form afterward is free.
If you regenerate a form with the exact same data, no additional credit is charged — AutoFiler recognizes the duplicate and returns your existing filing.
To email the forms to the destinations you set up, or to mail physical letters via USPS (with First Class, Certified, or Certified + Return Receipt tiers), head to Sending & Delivery. Your credit balance updates in real time as you download or send, and every action is logged in your Filing History.