Company Profile & QuickBooks
Getting Started · Company Profile & QuickBooks · Projects · Unions & Dispatch · Generating Forms · Sending & Delivery · Address Book · Filing History · Tips & FAQ
Company Profile & QuickBooks
Your Company Profile is the foundation of everything AutoFiler does. Enter your company details once and they auto-fill on every form you generate — DAS-140, DAS-142, Form 119, Pre-liens, and the lien waivers — so you never retype the same business information twice. You can open it anytime by clicking the Company Profile icon (🏢) in the top-right corner of the AutoFiler dashboard. (It lives at /my-account/company-profile/.)
The more of this profile you fill in, the more auto-filling happens downstream — so it’s worth completing thoroughly the first time.
Company Profile Fields
After logging in, you’ll be guided to complete your Company Profile. The information you enter here is used to auto-fill your company details on every form you generate.
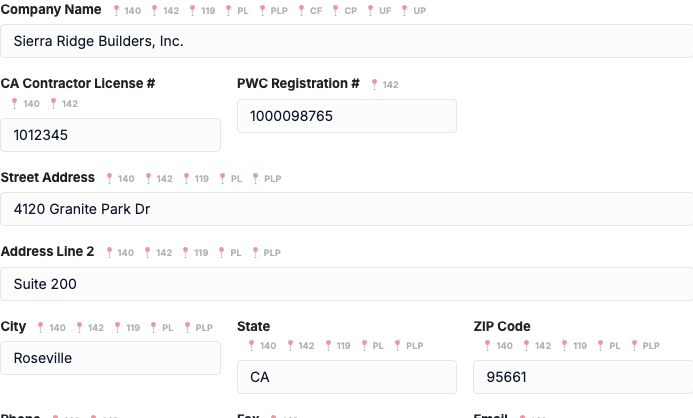
The fields
- Company Name — Your registered business name
- CA Contractor License # — Your California contractor license number
- PWC Registration # — Your Public Works Contractor registration number
- Street Address, City, State, ZIP — Your business mailing address (Google address autocomplete is available — start typing and pick your address from the list)
- Phone, Fax, Email — Your business contact information
- Your Job Title — Your title within the company (e.g., Owner, Project Manager)
Each field shows small colored tags indicating which forms it auto-fills — for example 140, 142, or PL — so you can see at a glance exactly where each piece of your data ends up.
Click Save Company Profile when you’re finished.
Signature
At the bottom of the Company Profile form is a signature pad. Draw your signature right in the box — with a mouse, trackpad, or your finger on a touch screen — and AutoFiler saves it to your account, then automatically applies it to every generated form that requires a signature. No more printing, signing, and scanning every filing.
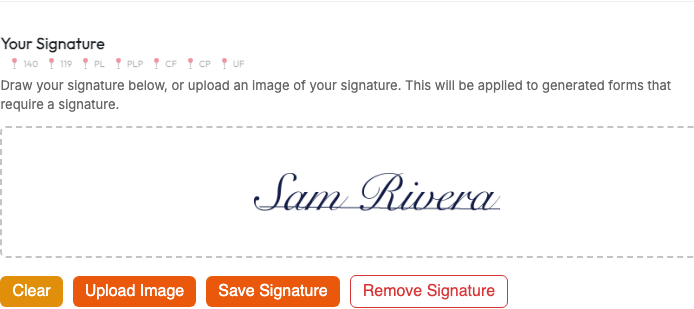
Prefer to upload an image?
Already have a scan or photo of your signature? Click Upload Image instead of drawing. AutoFiler opens a quick crop tool — drag and resize the box to isolate just your signature, and the white background is removed automatically so it sits cleanly on the signature line of your forms.
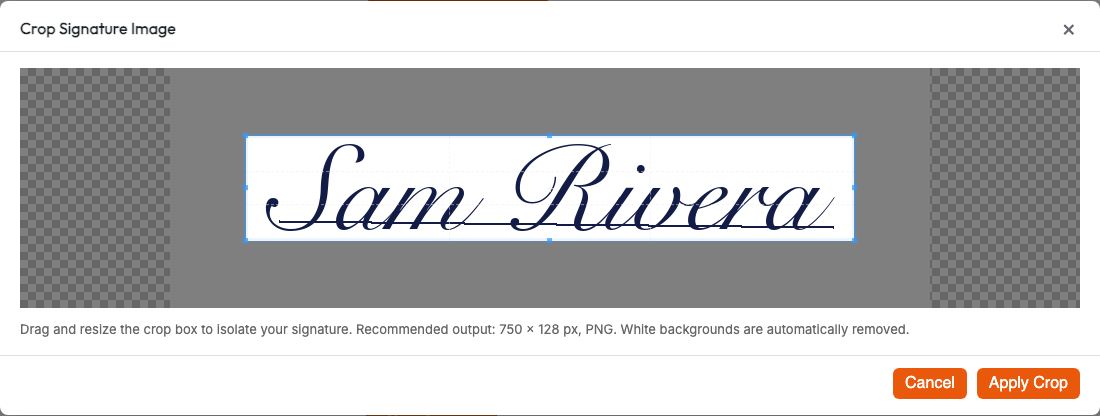
Connect QuickBooks Online
If you keep your customers and jobs in QuickBooks Online, you can connect it to AutoFiler and let your existing data do the data entry for you. A QuickBooks tab appears in your My Account menu at /my-account/quickbooks-connect/ — open it and connect your QuickBooks Online account through Intuit’s secure OAuth sign-in.
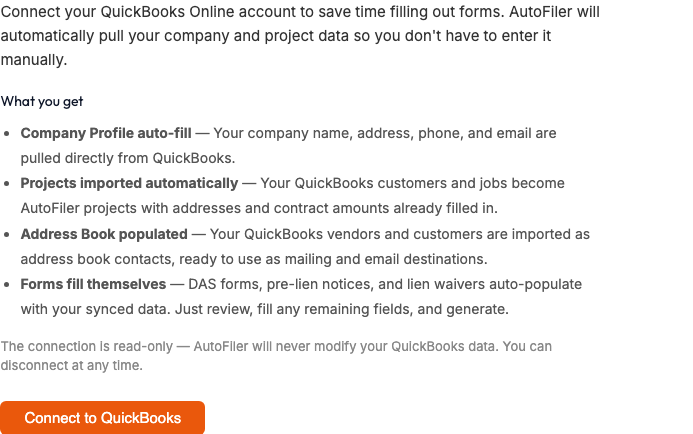
The connection is read-only. AutoFiler only reads information from QuickBooks to pre-fill your profile, projects, and address book — it never creates, edits, or deletes anything in your QuickBooks account. And you can disconnect at any time with the Disconnect button on this page.
What gets synced
Once connected, you’ll see Sync Company, Sync Projects, Sync Address Book, and Disconnect buttons. Each sync pulls the matching data from QuickBooks into AutoFiler:
- Company Profile auto-fill — Sync Company pulls your business name, address, phone, and email from QuickBooks into your Company Profile.
- Projects imported — Sync Projects turns your QuickBooks customers and jobs into AutoFiler projects, with their addresses, contract amounts, and the customer’s email and phone filled in for you.
- Address Book populated — Sync Address Book brings your QuickBooks vendors and customers in as saved addresses. Re-running the sync updates existing entries rather than creating duplicates, so you can sync as often as you like.
From there, everything works exactly as it does for data you entered by hand: your synced company details, projects, and addresses flow straight onto your forms automatically.
Next: create a Project →